Monday, August 4, 2008

Wood Effects through Photoshop filters

Video Tutorial Below


************************************************************************************

Written Tutorial

Step 1. open a new file - size can vary but needs to transparent. so set the background content tarnsparent.


step 2. fill foreground color by clicking the foreground tab RGB 181 93 8


Step3. click filters - noise - add noise amount - 68.32 and tick the monochromatic option and say ok

Add Noise
Applies random pixels to an image, simulating the effect of shooting pictures on high-speed film. You can also use the Add Noise filter to reduce banding in feathered selections or graduated fills or to give a more realistic look to heavily retouched areas. Options for noise distribution include Uniform and Gaussian. Uniform distributes color values of noise using random numbers between 0 and plus or minus the specified value, creating a subtle effect. Gaussian distributes color values of noise along a bell-shaped curve, creating a speckled effect. The Monochromatic option applies the filter to only the tonal elements in the image without changing the colors


step 4. filter - blur - motion blur distance - 9 and angle adjust to horizontal


Motion Blur
Blurs in the specified direction (from –360º to +360º) and at a specified intensity (from 1 to 999). The filter’s effect is analogous to taking a picture of a moving object with a fixed exposure time.


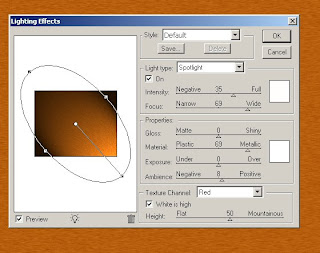
step 5. filte - render - lightings select the texture channel to red


6. filter - liquify give a wood timber effects
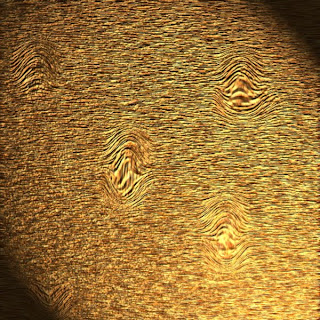


Thats all to get the desired effect.

Photoshop Effects
Tips for creating special effects
Creating edge effects
You can use various techniques to treat the edges of an effect applied to only part of an image. To leave a distinct edge, simply apply the filter. For a soft edge, feather the edge, and then apply the filter. For a transparent effect, apply the filter, and then use the Fade command to adjust the selection’s blending mode and opacity.
Applying filters to layers
You can apply filters to individual layers or to several layers in succession to build up an effect. For a filter to affect a layer, the layer must be visible and must contain pixels—for example, a neutral fill color.
Applying filters to individual channels
You can apply a filter to an individual channel, apply a different effect to each color channel, or apply the same filter but with different settings.
Creating backgrounds
By applying effects to solid‑color or grayscale shapes, you can generate a variety of backgrounds and textures. You might then blur these textures. Although some filters have little or no visible effect when applied to solid colors (for example, Glass), others produce interesting effects.
Combining multiple effects with masks or duplicate images
Using masks to create selection areas gives you more control over transitions from one effect to another. For example, you can filter the selection created with a mask.
You can also use the History Brush tool to paint a filter effect onto part of the image. First, apply the filter to an entire image. Next, step back in the History palette to the image state before the filter was applied, and set the history brush source to the filtered state. Then paint the image.
Improving image quality and consistency
You can disguise faults, alter or enhance images, or create a relationship among images by applying the same effect to each. Use the Actions palette to record the steps you take to modify one image, and then apply this action to the other images.