Video Tutorial Below
************************************************************************************
Written Tutorial
Step 1. open a new file - size can vary but needs to transparent. so set the background content tarnsparent.
step 2. fill foreground color by clicking the foreground tab RGB 181 93 8

Step3. click filters - noise - add noise amount - 68.32 and tick the monochromatic option and say ok
Add Noise 
Applies random pixels to an image, simulating the effect of shooting pictures on high-speed film. You can also use the Add Noise filter to reduce banding in feathered selections or graduated fills or to give a more realistic look to heavily retouched areas. Options for noise distribution include Uniform and Gaussian. Uniform distributes color values of noise using random numbers between 0 and plus or minus the specified value, creating a subtle effect. Gaussian distributes color values of noise along a bell-shaped curve, creating a speckled effect. The Monochromatic option applies the filter to only the tonal elements in the image without changing the colors
step 4. filter - blur - motion blur distance - 9 and angle adjust to horizontal
Motion Blur
Blurs in the specified direction (from –360º to +360º) and at a specified intensity (from 1 to 999). The filter’s effect is analogous to taking a picture of a moving object with a fixed exposure time.
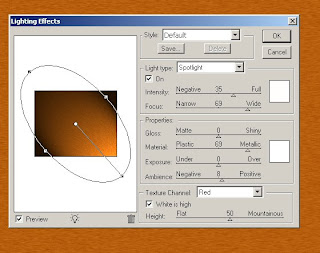
step 5. filte - render - lightings select the texture channel to red
6. filter - liquify give a wood timber effects
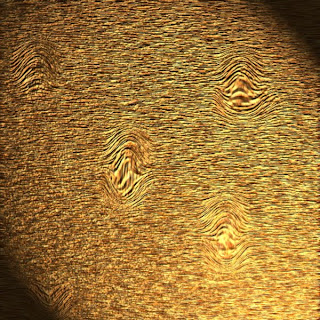
Thats all to get the desired effect.
No comments:
Post a Comment